Grid Plus plugin offers a powerful configuration tool to make each grid your own and allows you to display various content formats in a highly customizable grid. It is designed to be an all-in-one grid solution for all kinds of websites – from blogs, to product sliders, Woocommerce shops, galleries, portfolios and anything else you can imagine.
In order to use Grid Plus, you need to have WordPress installation ready. If you're not familiar in
installing WordPress, there are several great online resources you can refer to:
It's highly encouraged for you to always have the latest version of WordPress installed, this will
also keep your site being more secure.
To get yourself familiar with WordPress after installing, there is a great resource from
wp.tutsplus.com teaching a lot of aspect in WordPress administration. Please check it out WP101 Basix Training.
What's Included in the Package
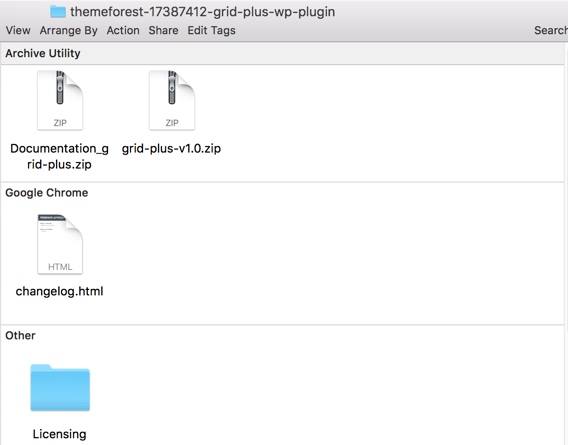
Grid Plus plugin package includes these files:
documentation
documents
plugins
grid-plus.v1.0.zip
licensing
GPL.txt
README_License.txt
What's Included in the Package
Grid Plus requires WordPress 4.4+ to run properly. Therefore the minimum requirement of WordPress 4.4 is needed:
PHP version 5.4 or greater
MySQL version 5.0 or greater
Important quote from WordPress site:
Hosting is more secure when PHP applications, like WordPress, are run using your account’s
username
instead of the server’s default shared username. The most common way nowadays for hosting
companies
to do this is using suPHP. Just ask your potential host if they run suPHP or something
similar.
Installation
This section will gives you explanation on how to setup Grid Plus plugin.
Firstly, please make sure that you have downloaded Grid Plus files from your Themeforest account.
There are two ways to install the plugin. Using Wordpess Plugin Uploader or FTP. Before intstalling
the
plugin you should unzip the downloaded package to a folder on your hard drive. After extracting the
file
you can find some folders and a zipped file "grid-plus.v1.0.zip" in the root of your folder.
grid-plus.v1.0.zip contains the plugin data.
WordPress Plugin Uploader
If you use "WordPress Plugin Uploader" to install the plugin, then you should NOT unzip
grid-plus.v1.0.zip file.
Installation steps:
Log into your WordPress admin panel.
Navigate to Plugins » Add New.
Click to Upload.
Click to Choose File and select the
grid-plus.v1.0.zip file.
Click to Install Now.
FTP steps:
Unzip the grid-plus.v1.0.zip file to a folder on your hard drive.
Upload the grid-plus folder to the WordPress' plugins folder (example:
http://yourserver/wordpress/wp-content/plugins/) on your server using FTP.
You could consult our guide on How to Install Grid Plus
Video guide on How to install Grid Plus plugin
Features
This page will give you complete explanation on Grid Plus Features.
Responsive
Grid Plus uses 4 breakpoints, they are standard screen, widget,tablet, and mobile. The standard screen breakpoint uses 992px wrapper width. Wide Screen breakpoint uses 1170px wrapper width. Tablet breakpoint uses
768px
wrapper width. Mobile breakpoint uses full width wrapper which is flexible to the screen size.
Unlimited Colors & Custom CSS
You can set your own color scheme or choose from custom css for each grid. Besides with custom css
help you can set stylesheet for item effect, title font, color ...
Multiple Layout
Grid Plus provider layout builder help you can build many layout follow what you want ex:
Grid layout
Masonry layout
Metro layout
Filter & Paging & Animation
Grid Plus user ajax filter on category choice and paging help you organize post or custom post type
follow way that you want
Add more skin
Grid provide action hook for developer can be add more item skin.
Import & Export
With import & export function, you can easily backup grid layout from local or develop website to
go-live website or customer's website .
Plugin Overview
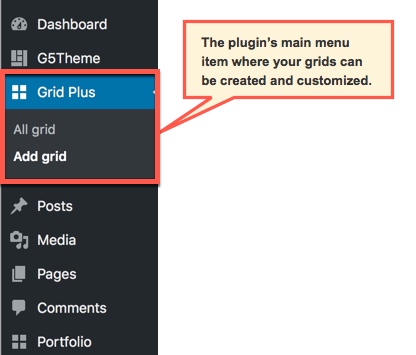
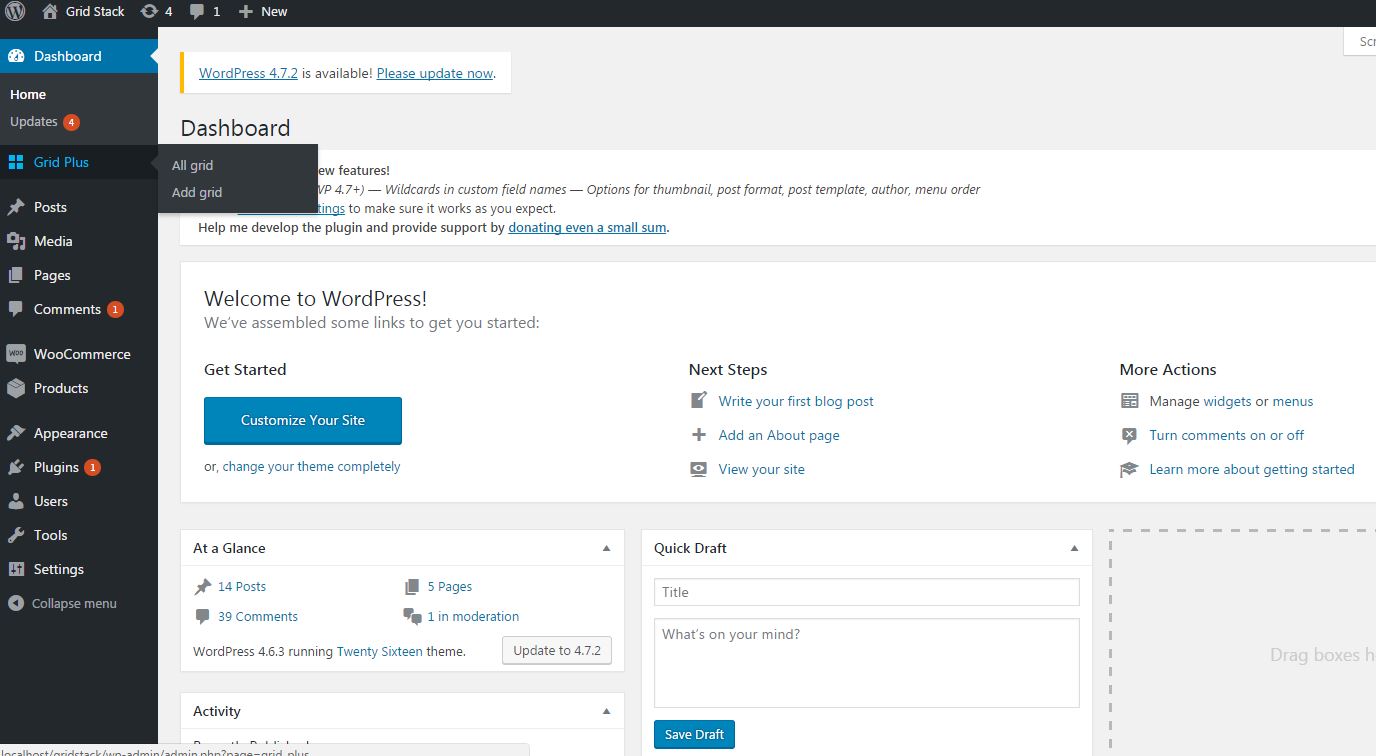
Once you've installed and activated Grid Plus, you'll see a new menu item named Grid Plus in your WP main menu.
Grid Plus menu item
All Grid
All Grid tab list of all grids that have been made.
Add Grid
Add Grid tab to add a new grid layout.
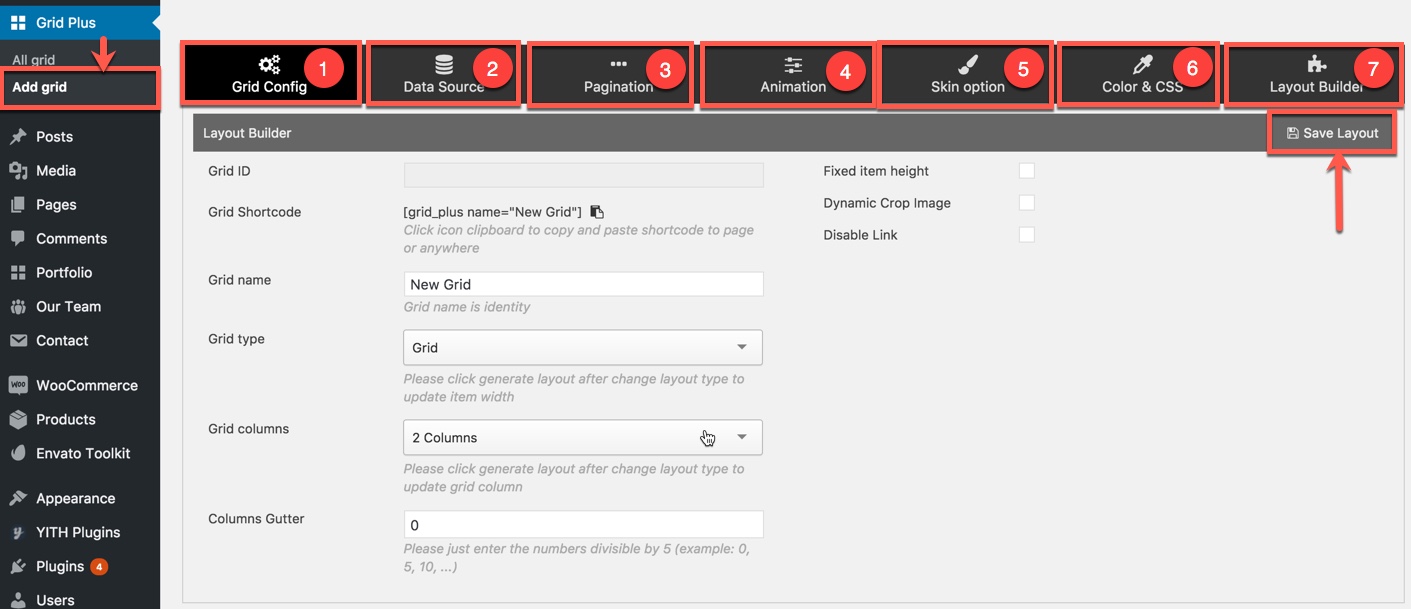
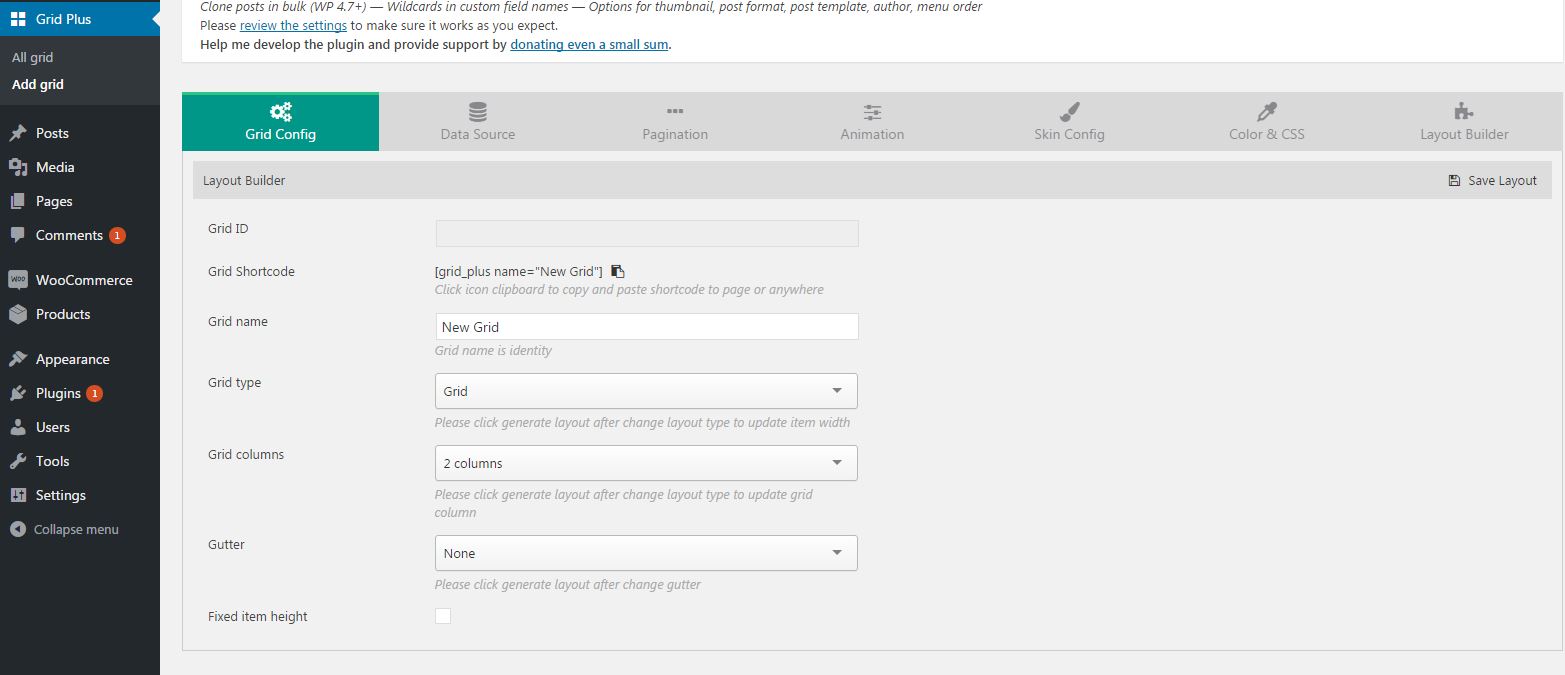
7 tabs is the core parts of a grid that you need to setup.
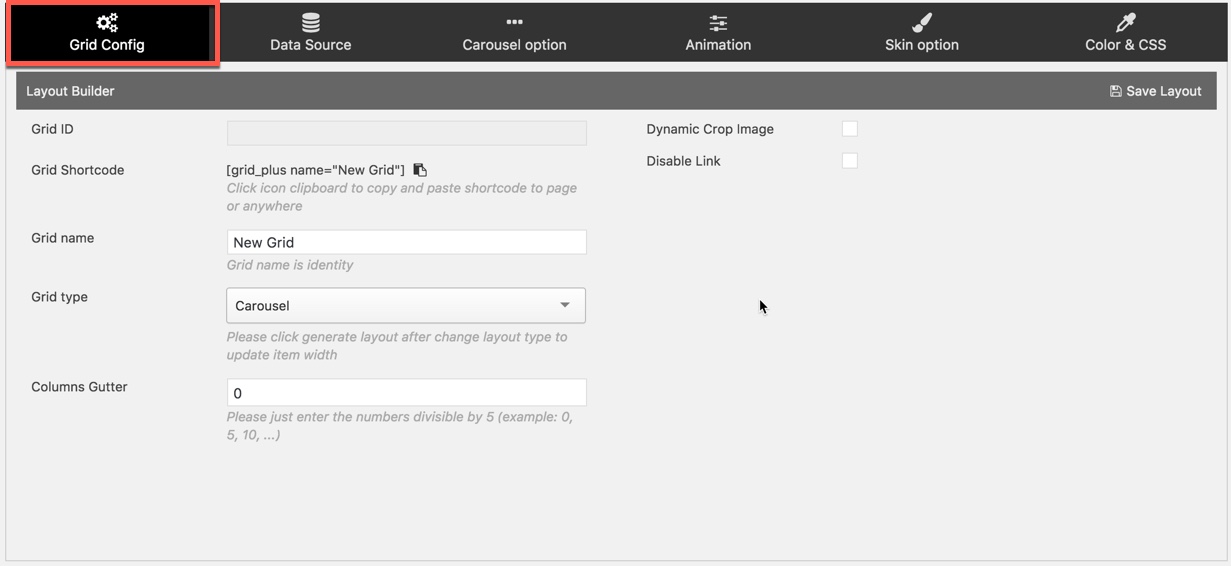
1-Grid Config: Modify things like grid name, grid type, grid columns, columns gutter for your grid. Input grid name into Grid name field. It is identifier and system will be show notice when input duplicate grid name.
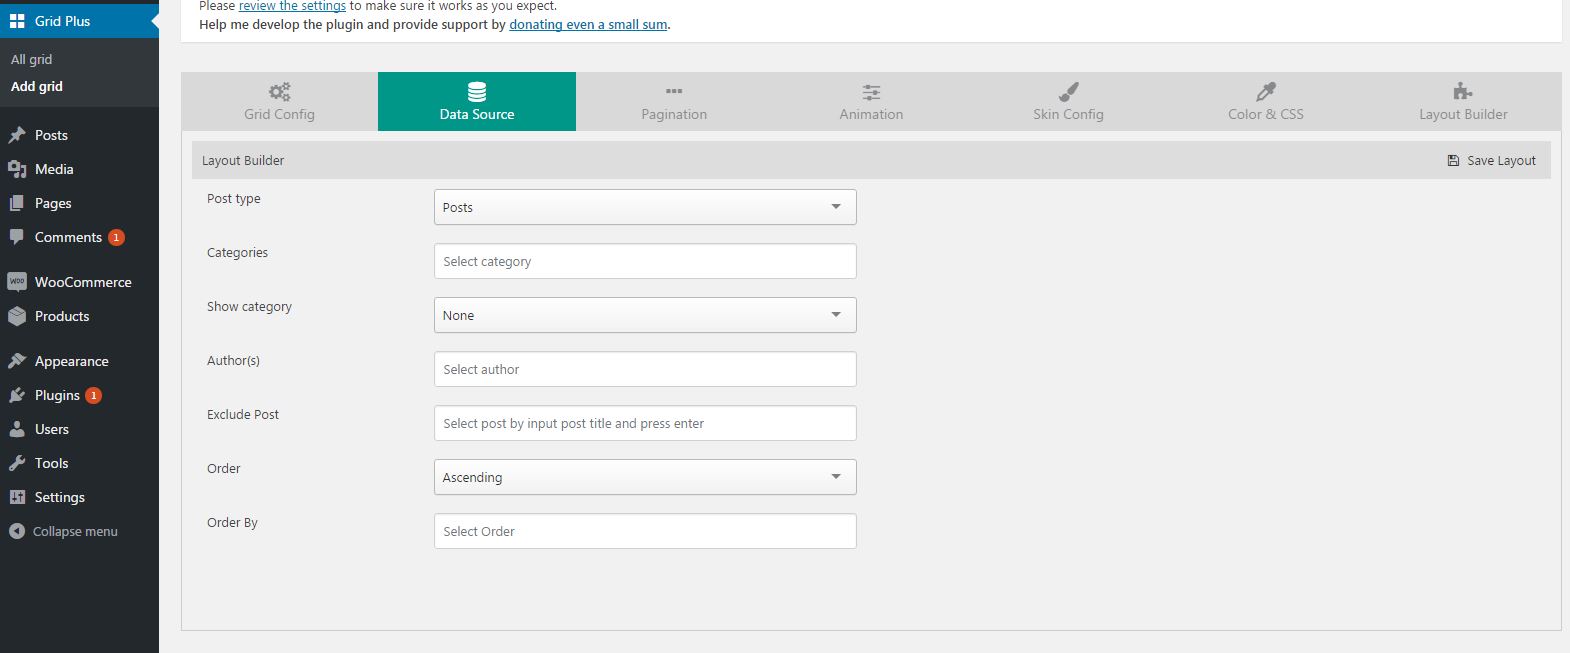
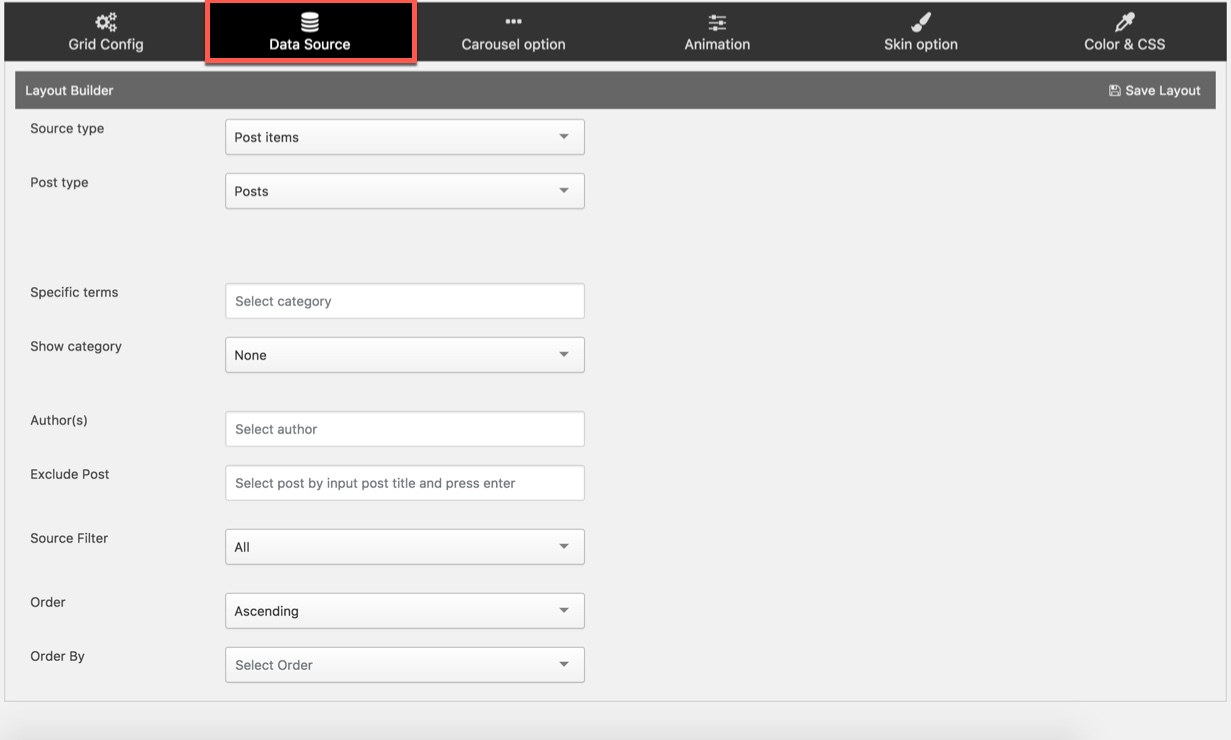
2-Data Source: Select query to display by choice in Data Source tab
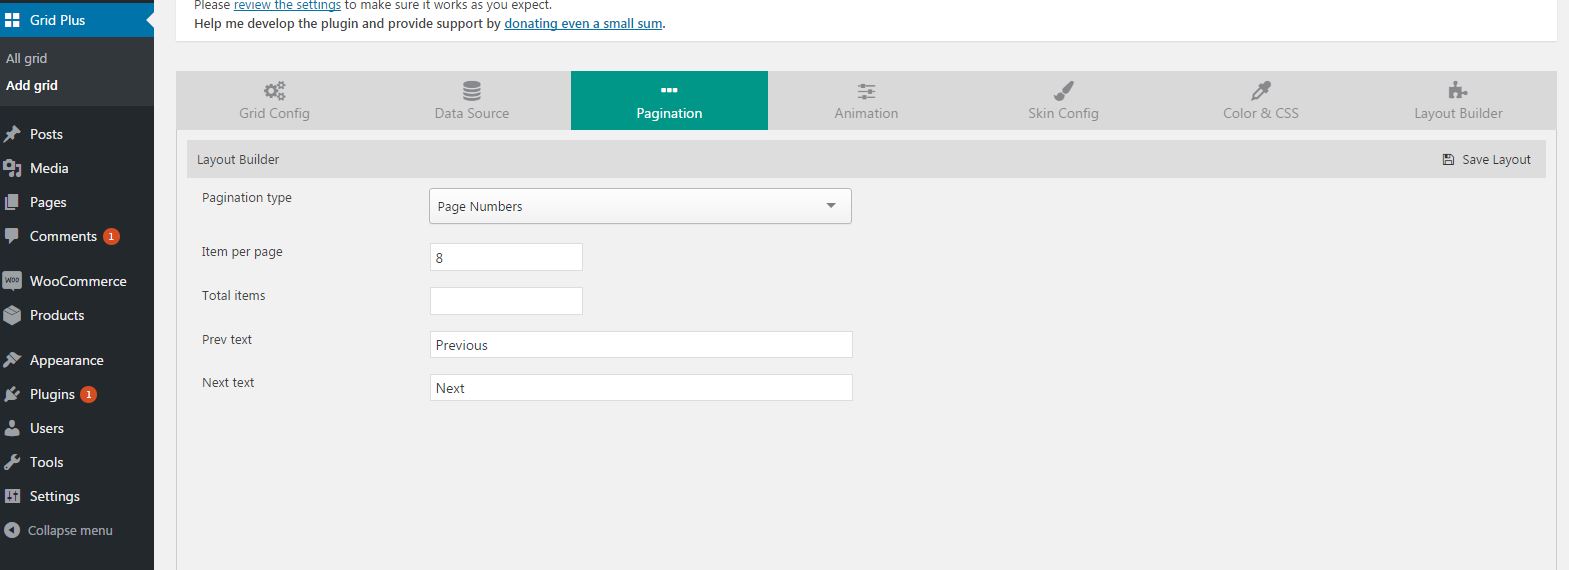
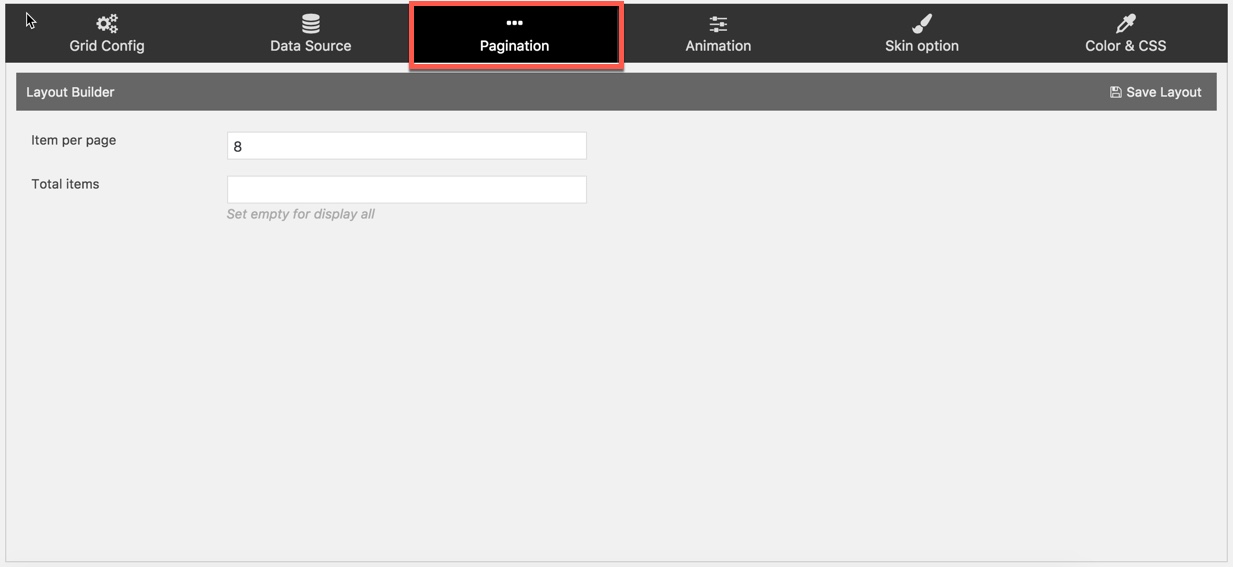
3-Pagination: This tab has Pagination styles to choose such as pagination type, item per page, total items...
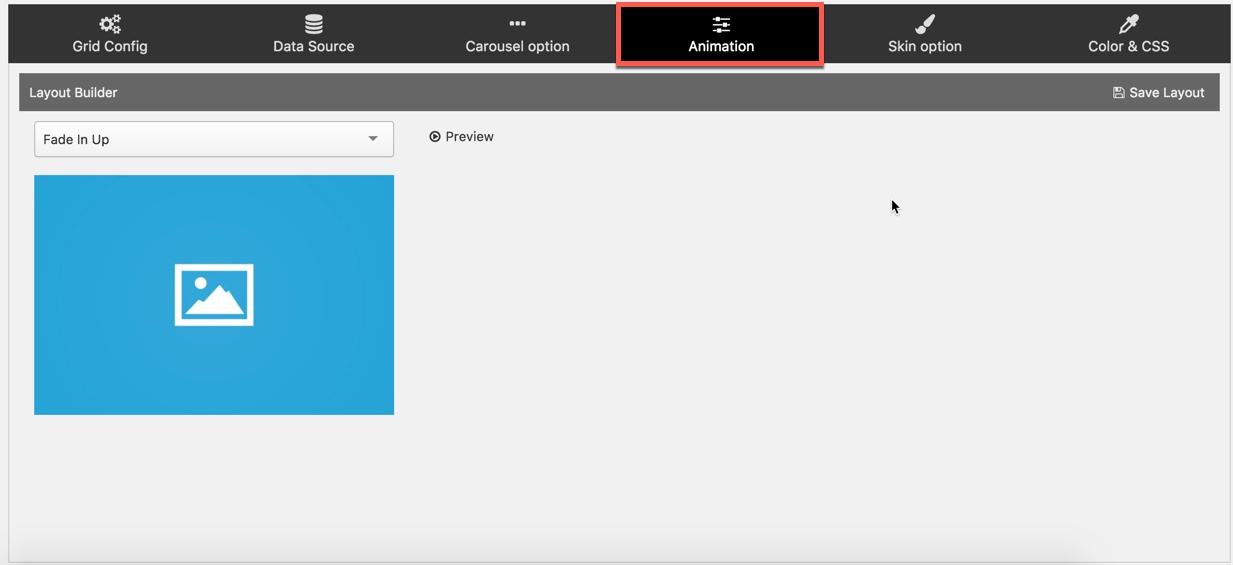
4-Animation: Choose animation style.
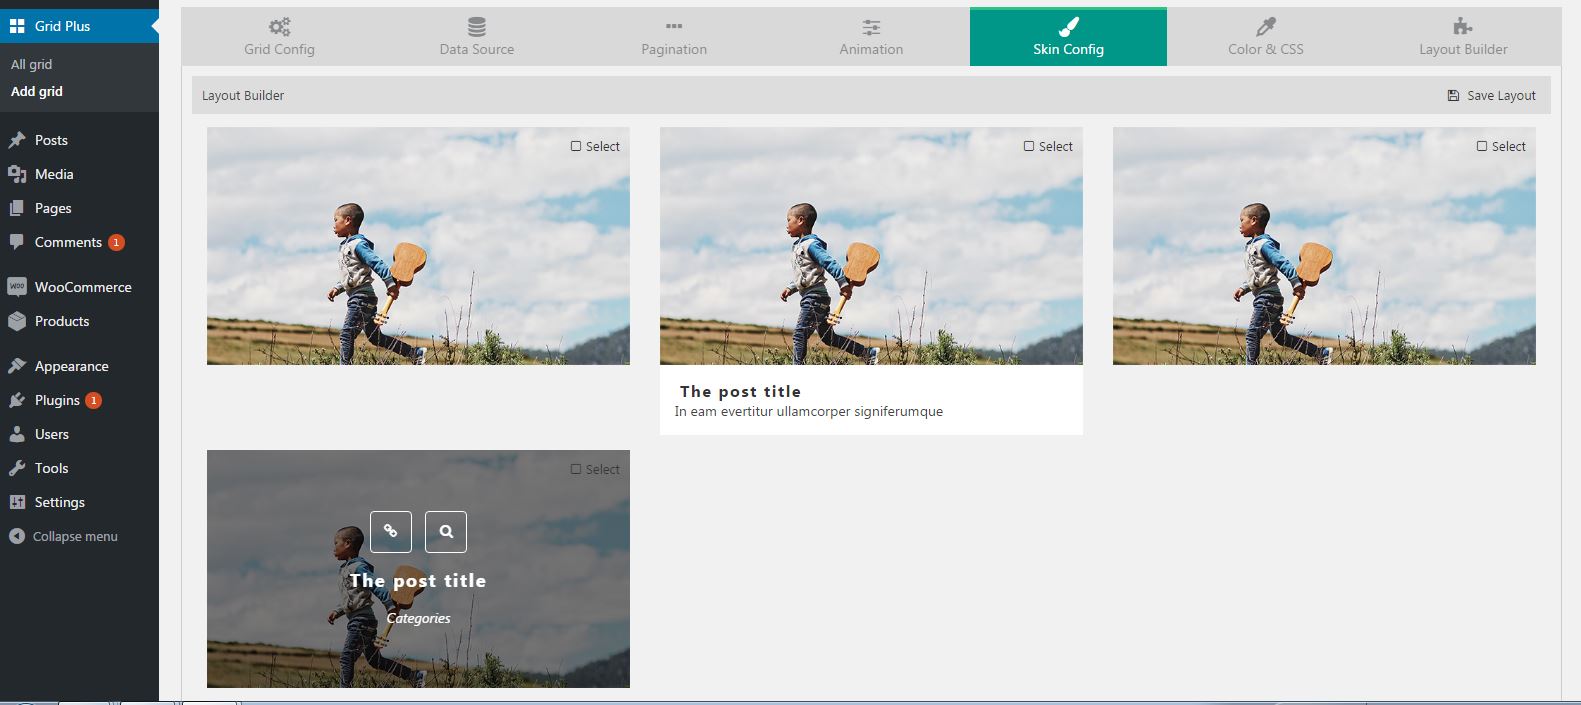
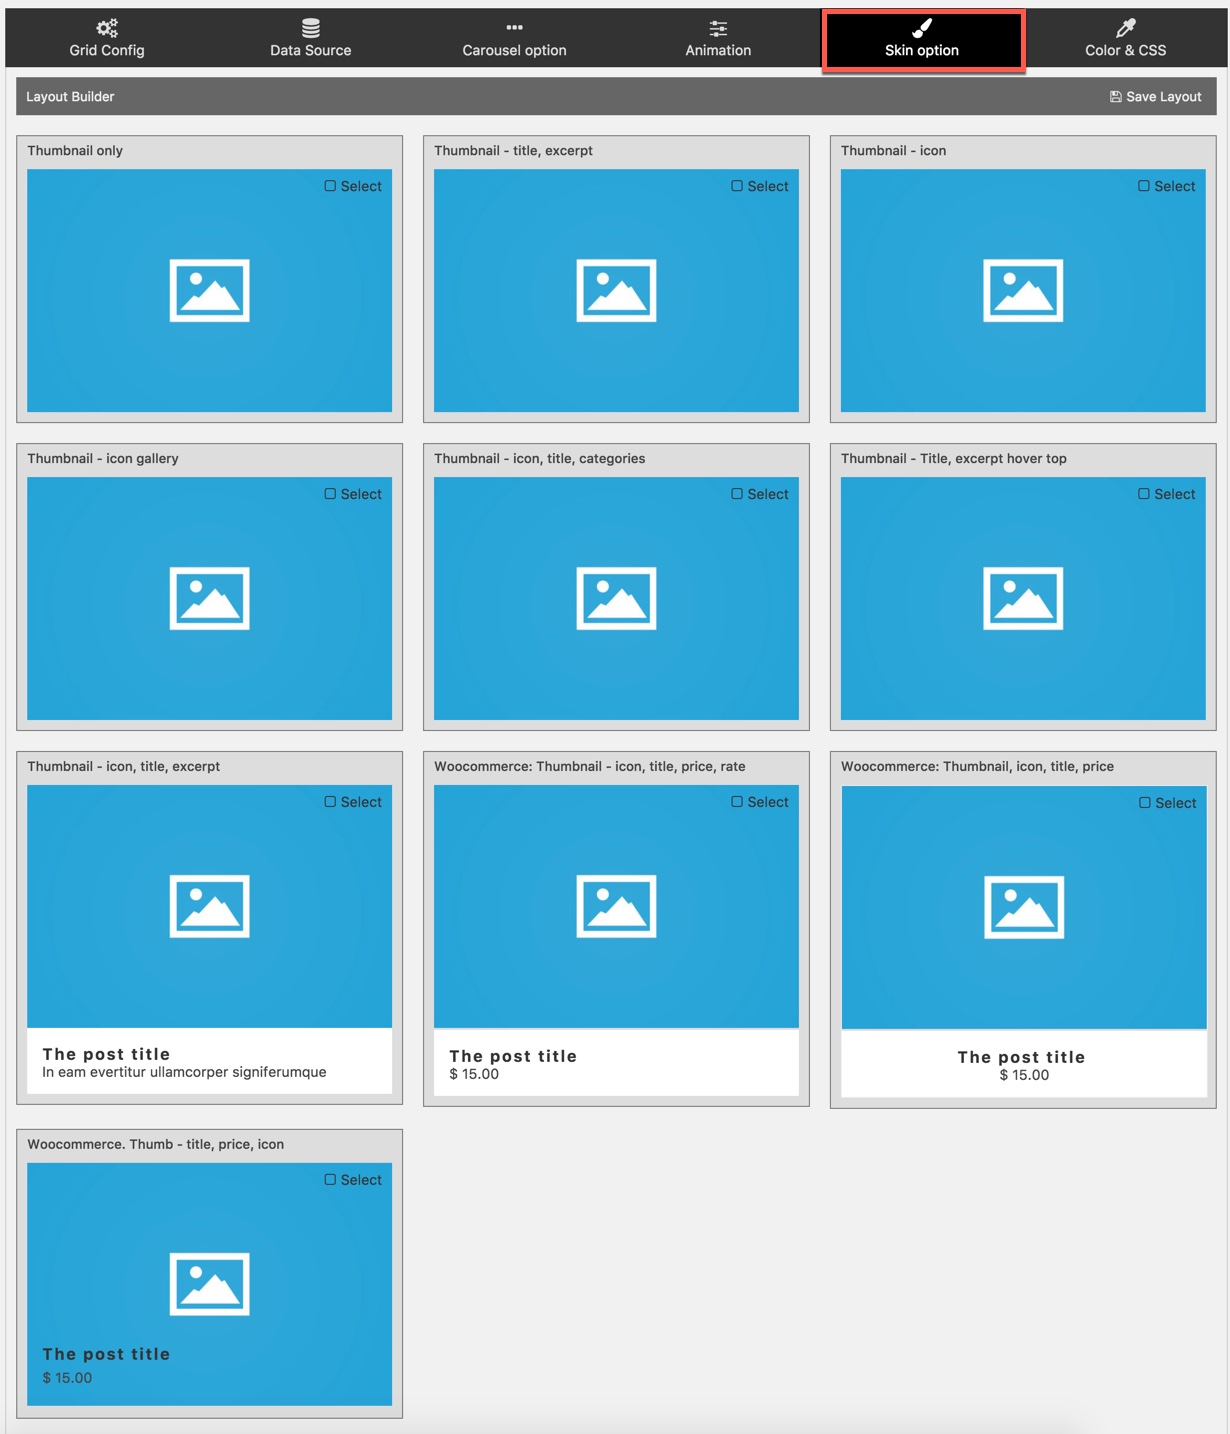
5-Skin Option: Grid Plus comes with 10 prebuilt hand-crafted designs that you can choose from.
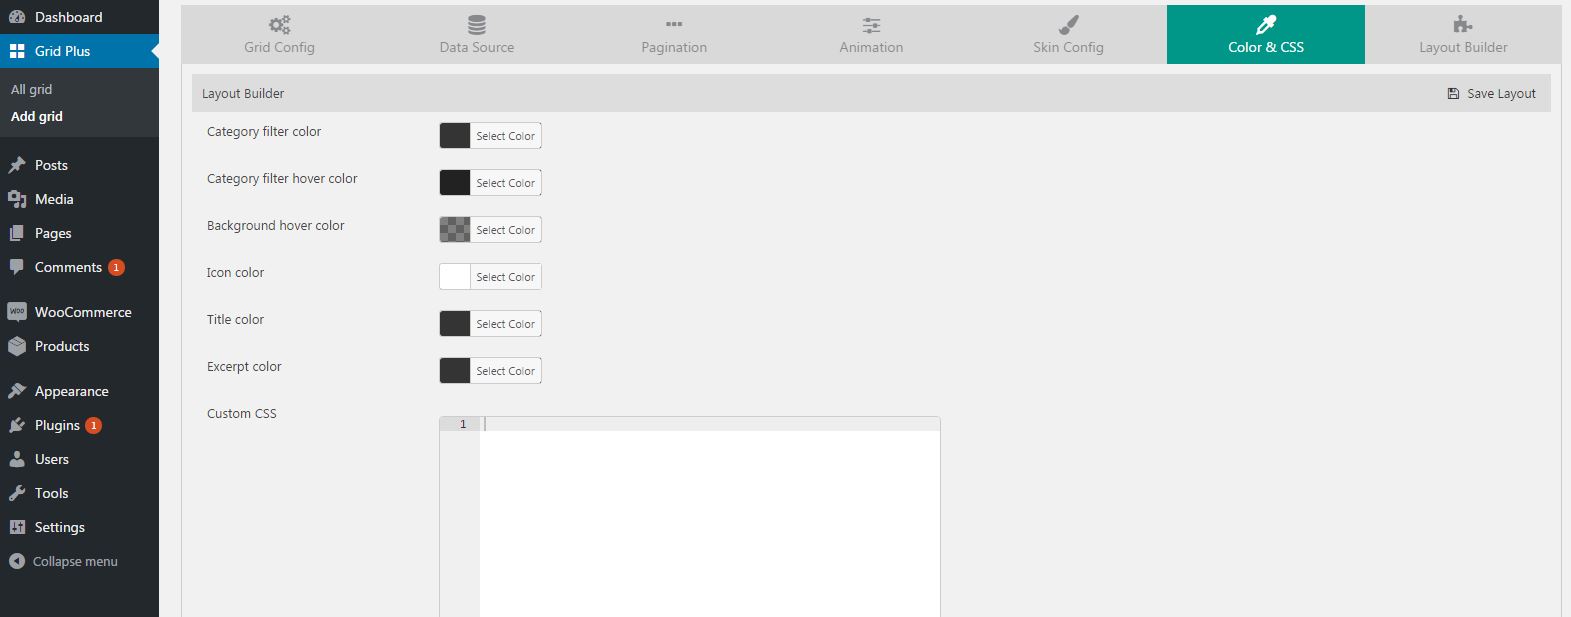
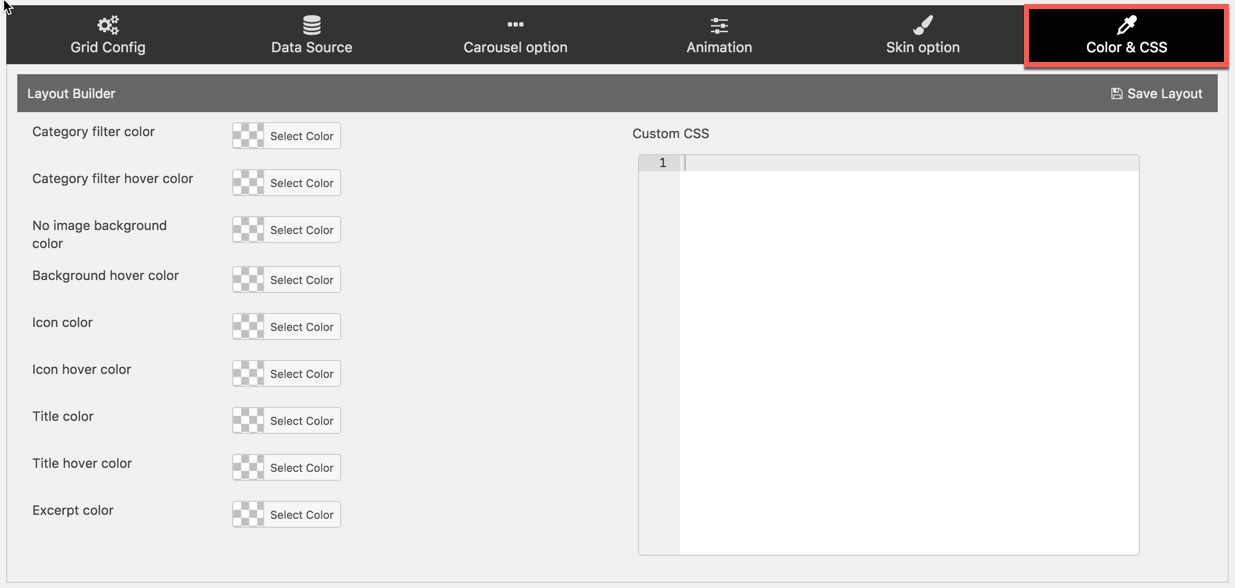
6-Color & CSS: Set your own color scheme or choose from custom CSS for each grid.
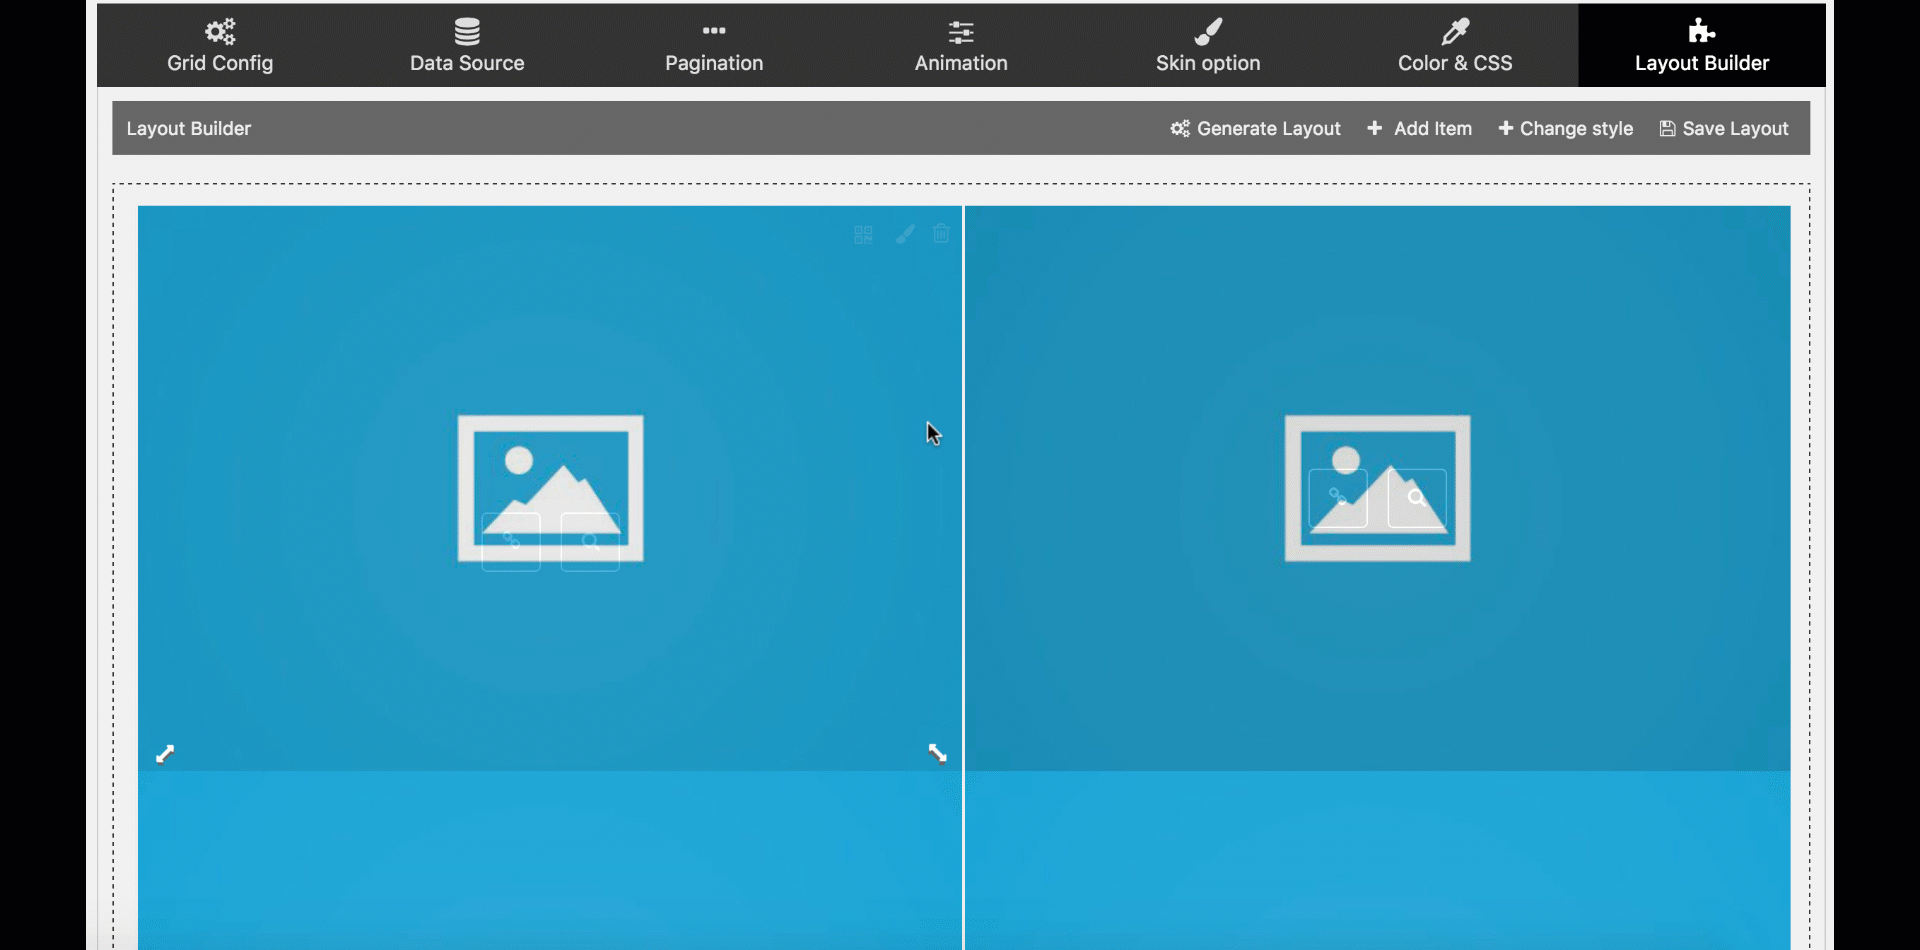
7-Layout Builder: This tab includes several layout options and you can customized by visiting Change image ratio in toolbar and change width/height ratio of item.
Click Create Grid Layout section to consult how to create a new grid layout step by step.
Page/Post Options
After installing the Grid Plus plugin, you'll notice that some additional options have been added to your posts and pages.
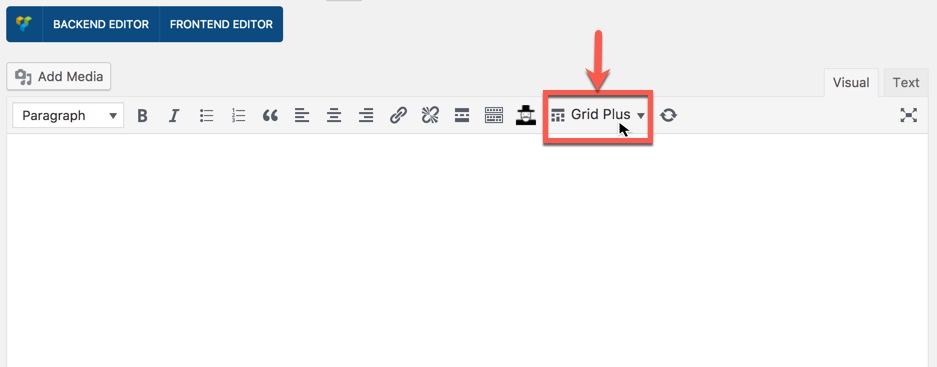
Quick Grids/Shortcode Generator Button
Quick Grids/Shortcode Generator Button will display in Editor toolbar. Click to Quick Grids/Shortcode Generator Button then choose a grid name will generate a shortcode from an existing grid and apply to your page.
Quick Grids button in Page and Post Editor toolbar
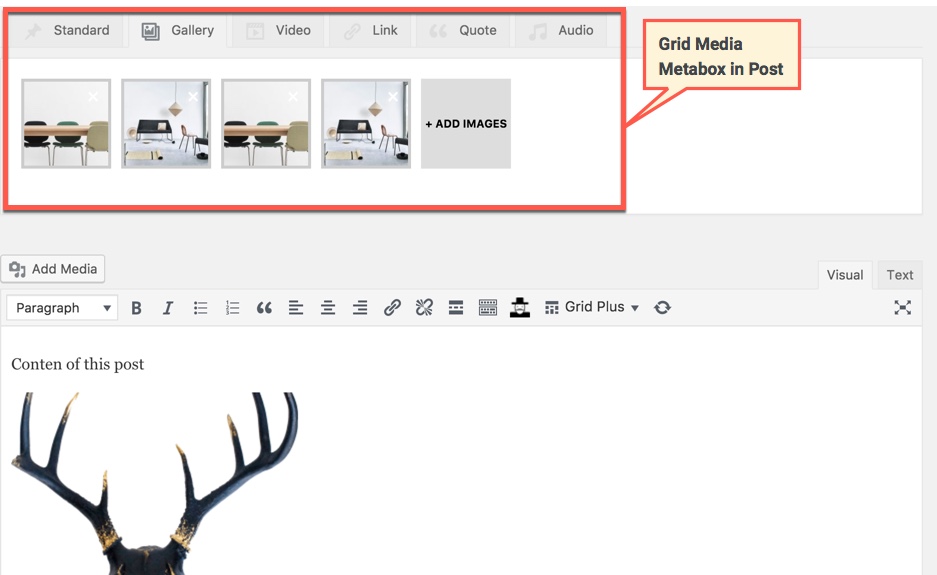
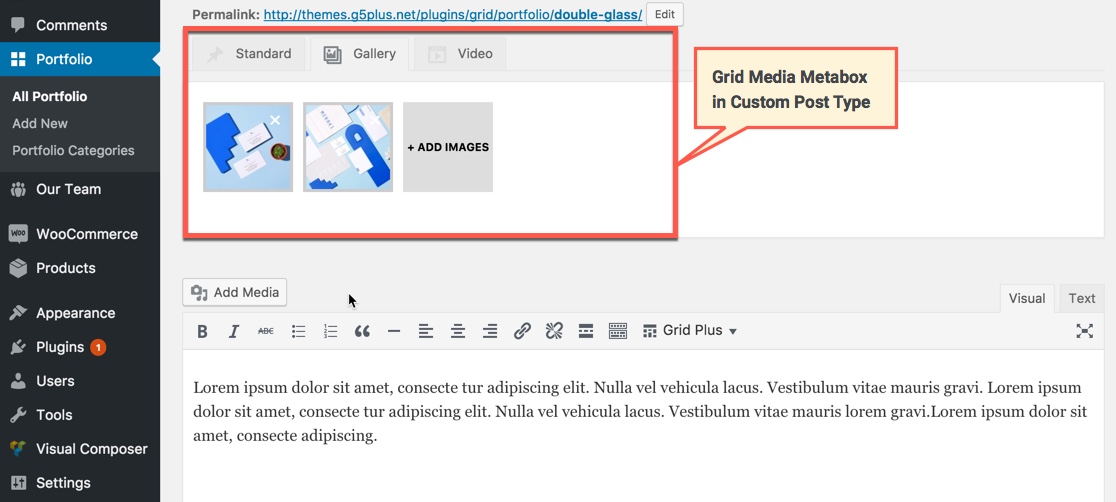
Grid Media Metabox
Grid Media Metabox has been added in Post and Custom Post Types (such as Portfolio and Our Team). It means where the post is being pulled into an Grid Plus on another one of your site’s pages (displayed by featured image of post), all media in Grid Media Metabox that you chose will be displayed media popup at the frontend.
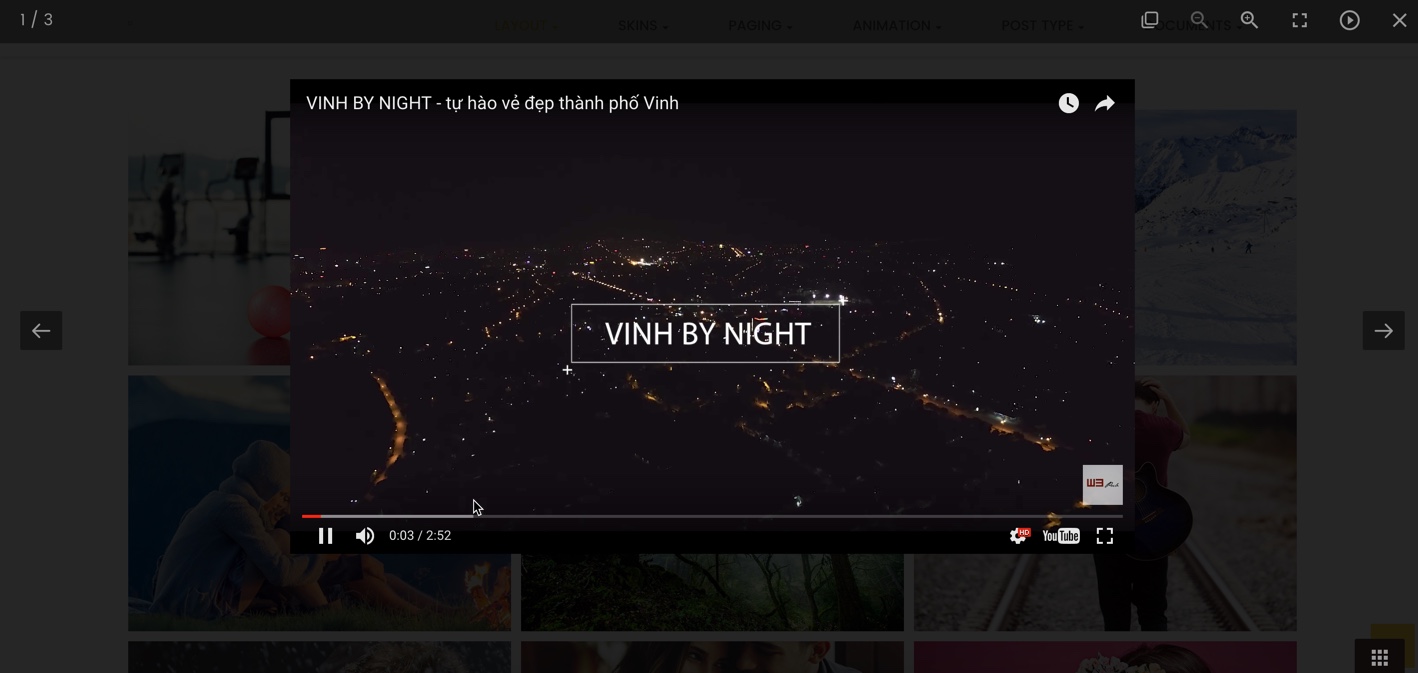
Video how to use Grid Media Metabox:
Video guide on how to use Grid Media Metabox
Note: With video gallery, it requires input video link and seperator by "," charactor between 2 video link.
Grid Media Metabox in Post
Grid Media Metabox in Portfolio
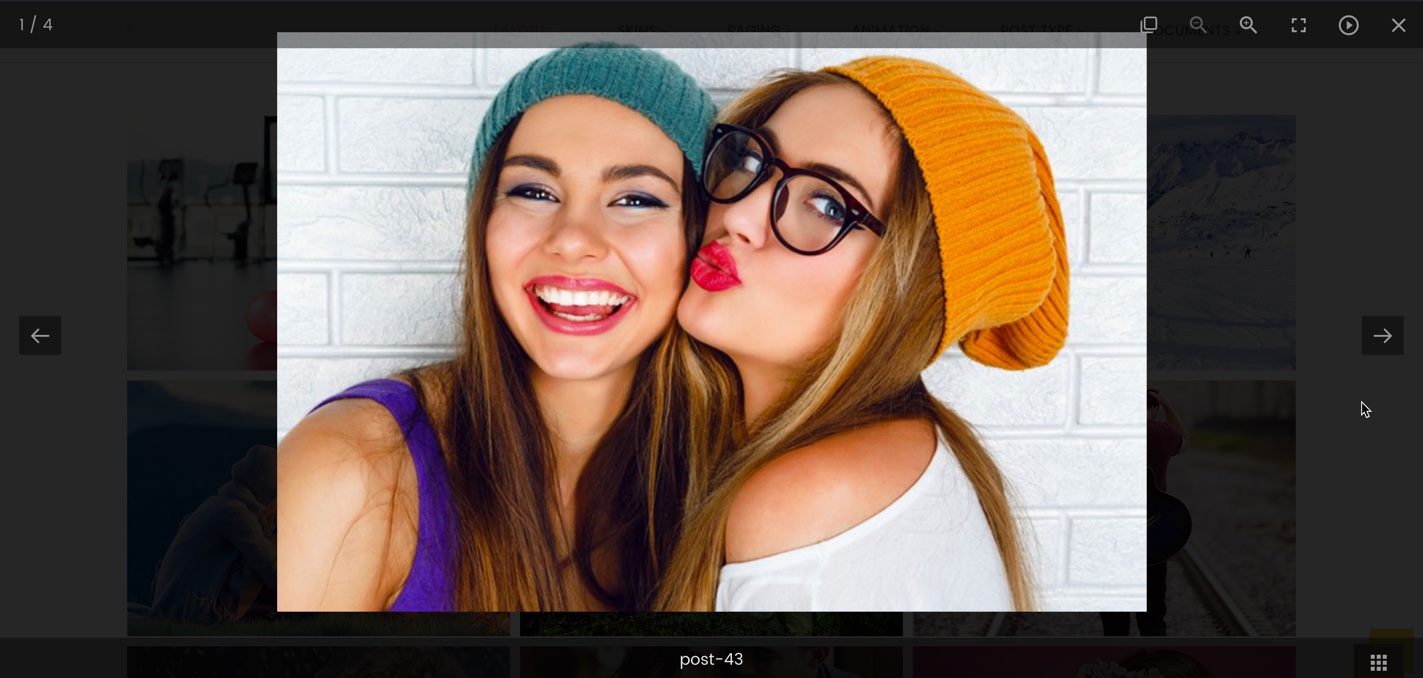
Image gallery popup in the frontend
Video gallery popup in the frontend
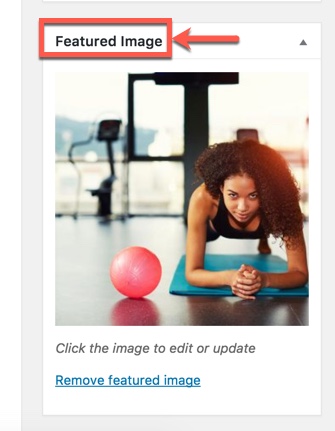
Featured Image
Featured Image Assign a "Featured Image" to the post that can be used as the grid item's main media image.
Choose featured image in the backend
Featured image in the frontend
Custom URL
Custom URL features help you custom link URL of an item (media) in a grid layout or custom link URL any post in the grid. For example, you select some images to display as gallary in a grid layout, you can custom the url for each images that you chose. It is the same to display posts of a category in the grid.
Video guide on how to custom URL in a grid
Video guide on how to use Grid Media Metabox
How to create Grid layout
Grid Plus plugin includes several layout options that can be found inside the “Grid config” tab.
This section will gives you explanation on How to create Grid layout
Log into your WordPress admin panel.
Navigate to Grid Plus » Add grid.
Input grid name into Grid name field. It is identifier and system will be show notice when input duplicate grid name
Choice Grid type is 'Grid'
Select query to display by choice in Data Source tab
Choice pagination type, items number to display in Pagination tab
Choose animation for items in Animation tab.
Select skin for items to display in Skin Option tab.
Custom color and add custom CSS as your liking in the Color&CSS tab.
Click 'Generate Layout' in Layout Builder tab to generate grid layout. After generate layout, you can change skin by click 'Change style' in toolbar or change width/heigh ratio of item (The height of the grid item is based on the individual grid item’s width, in relation to the “Items Ratio X:Y” setting so if our individual grid items have a width of 250px, and an “Items Ratio” of “4×3”, the grid item’s height would be around 188px tall).
Click Save to save grid.
To use Grid layout, you can click clipboard icon in 'Grid Shortcode' field at Grid Config tab, plugin will be copy shortcode to clipboard and you can paste this shortcode to every where in page or widget.
Step add grid.
'Grid Config' tab in add grid screen.
'Data Source' tab in add grid screen.
'Pagination' tab in add grid screen.
'Animation' tab in add grid screen.
'Skins' tab in add grid screen.
'Color & CSS' tab in add grid screen.
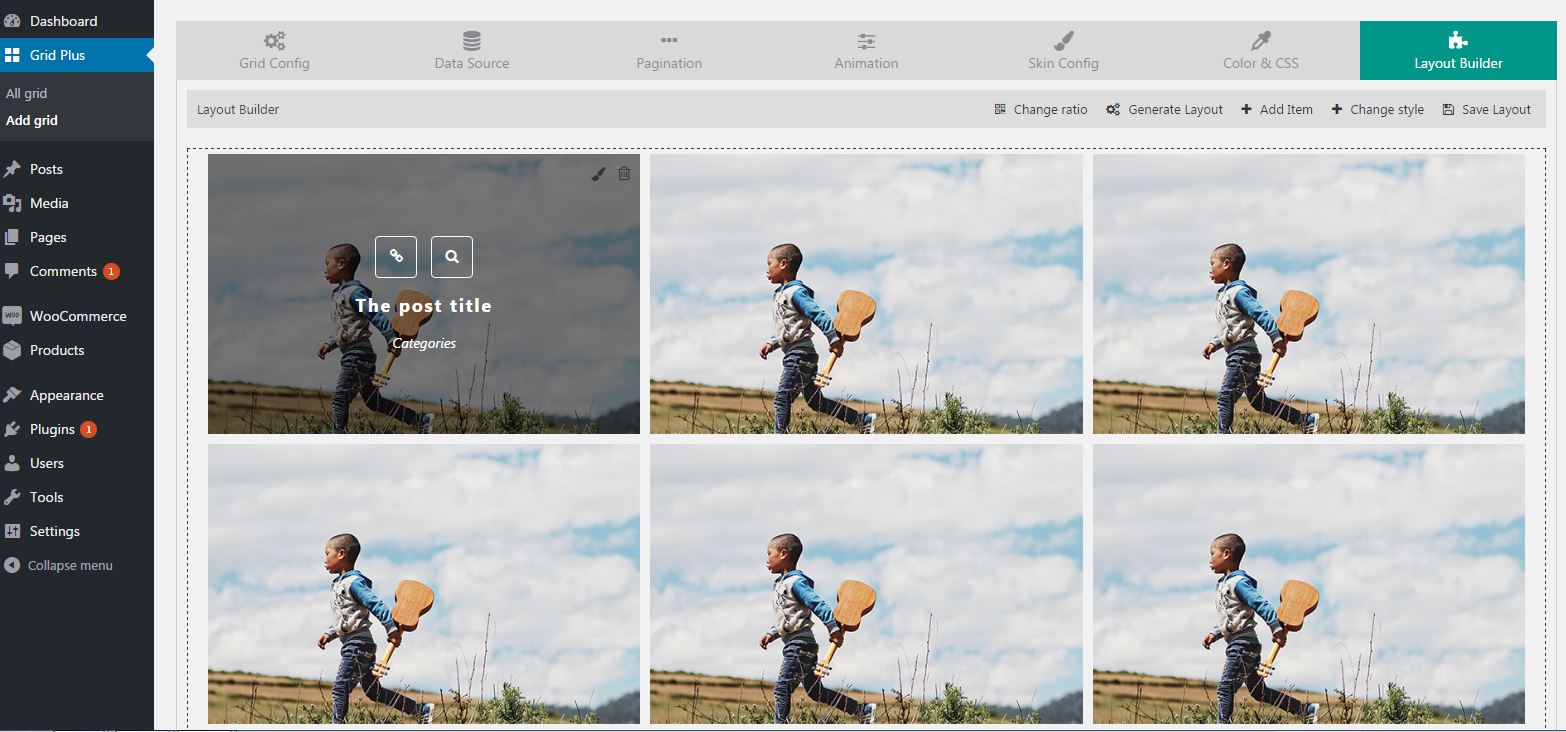
'Layout Builder' tab in add grid screen.
Video guide on how to create Grid layout:
Video guide on how to create Grid layout:
How to create Masonry layout
The step create a Masonry layout is similar create grid layout view here
Video guide on how to create Masonry layout:
Video guide on how to create Masonry layout:
How to create Carousel layout
The steps to create a Carousel layout is similar to the process to create Grid layout however it has some different options:
Choice Grid type is 'Carousel'
Select query to display by choice in Data Source tab
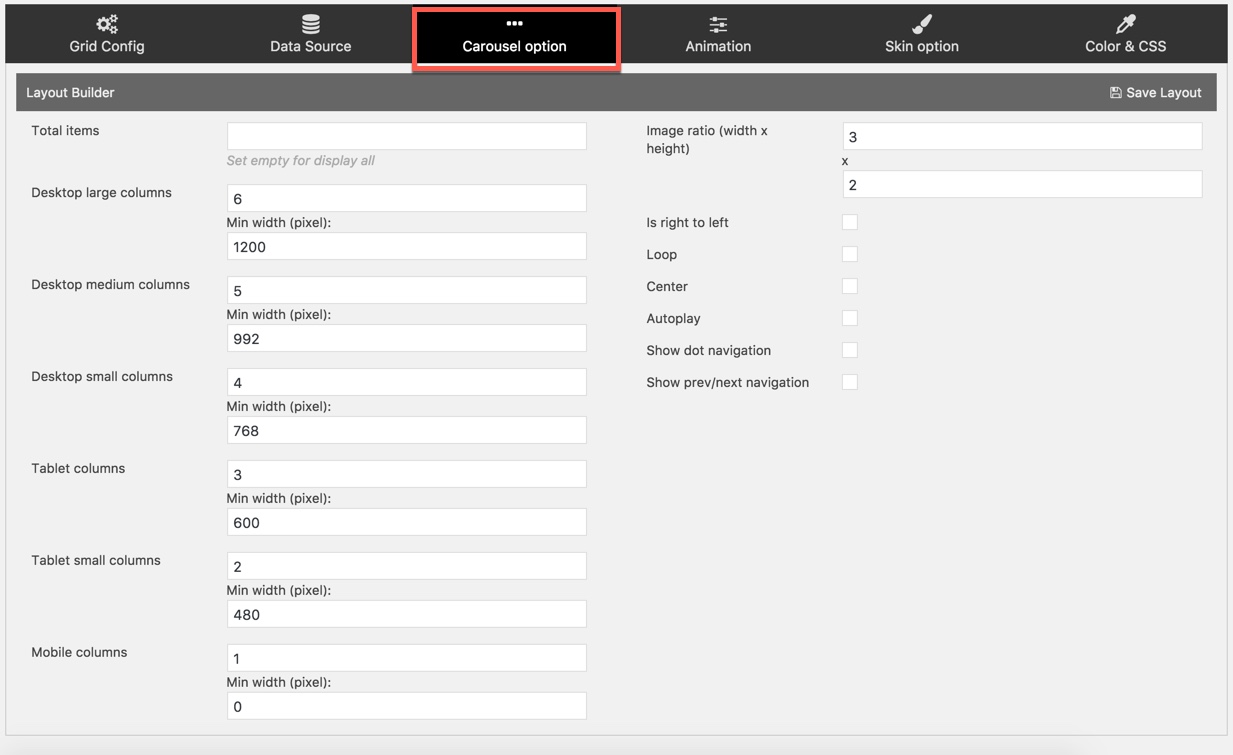
Choice column settings, image ratio in Carousel Option tab
Choose animation for items in Animation tab.
Select skin for items to display in Skin Option tab.
Custom color and add custom CSS as your liking in the Color&CSS tab.
Click Save to save grid.
To use Carousel layout, you can click clipboard icon in 'Grid Shortcode' field at Grid Config tab, plugin will be copy shortcode to clipboard and you can paste this shortcode to every where in page or widget.
'Grid Config' tab for Carousel layout in add grid screen.
'Data Source' tab for Carousel layout in add grid screen.
'Carousel Option' tab for Carousel layout in add grid screen.
'Animation' tab for Carousel layout in add grid screen.
'Skins' tab for Carousel layout in add grid screen.
'Color & CSS' for Carousel layout tab in add grid screen.
Video how to create Carousel layout:
Video guide on how to create Carousel layout
How to create Metro layout
The Metro layout is one of extra layouts in Grid Plus premium version. The steps to create a Metro layout is similar to process to create Grid layout view here
When you choose Metro layout, you can not only change image ratio but also change the height/width of the items by simply drag and drop as below:
The height/width of the items can vary
Video how to create metro layout:
Video guide on how to create Masonry layout:
In Metro Layout has an options that allows users custom content in grid.
Video guide on how to use Custom Content in Metro layout:
How to create Justifield layout
The Justifield layout is one of extra layouts in Grid Plus premium version. The steps to create a Justifield layout is similar to the process to create Grid layout however it has some different options:
Choice Grid type is 'Justifield'
SetupRow height for items
Select query to display by choice in Data Source tab
Setting items number to display in Pagination tab
Choose animation for items in Animation tab.
Select skin for items to display in Skin Option tab.
Custom color and add custom CSS as your liking in the Color&CSS tab.
Click Save to save grid.
To use Justifield layout, you can click clipboard icon in 'Grid Shortcode' field at Grid Config tab, plugin will be copy shortcode to clipboard and you can paste this shortcode to every where in page or widget.
'Grid Config' tab for Justifield layout in add grid screen.
'Pagination' tab for Justifield layout in add grid screen.
Video how to create Justifield layout:
How to add new skin
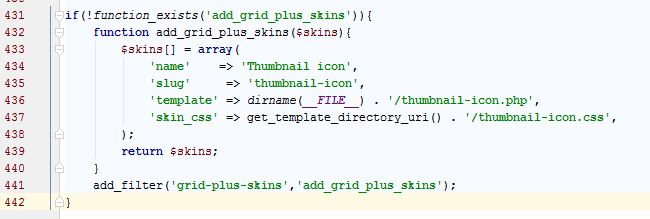
Grid Plus provide 'grid-plus-skins' filter hook to help custom can be add new skin
Add skin filter hook.
In this function, you need insert array to $skins parameter. This array have 4 key.
name: This is skin name
slug: This is identifier to distinguish each skin in listing
template: This is file path point to .php file
skin_css: This is file path point to .css file
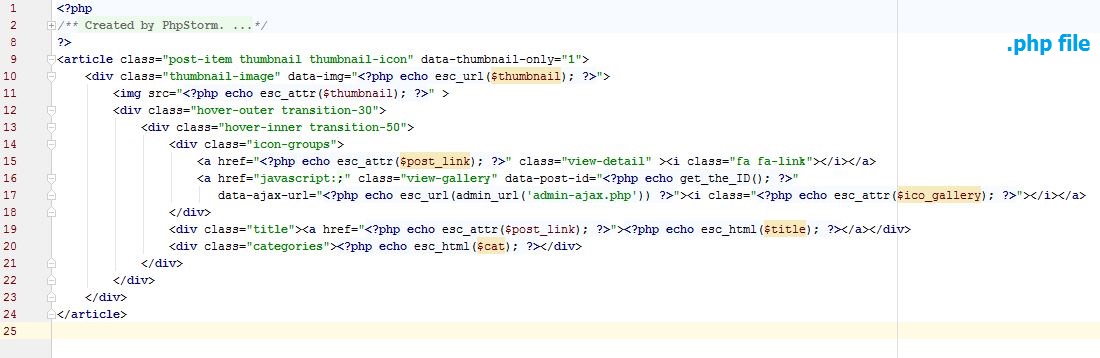
The are two file need include when add new skin.
.php file: This is file define what is information will be on display
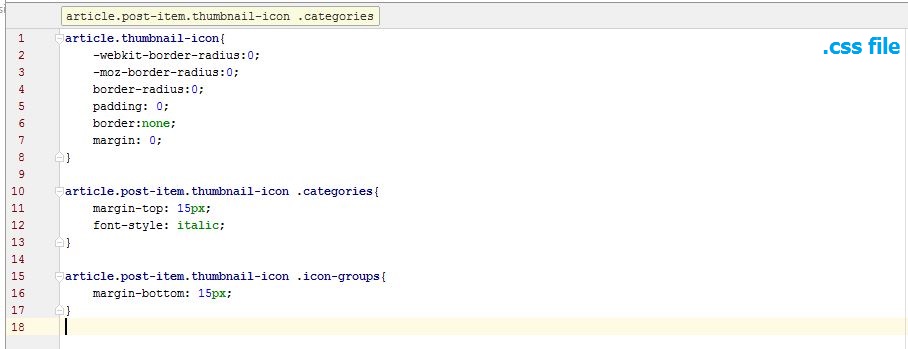
.css file: This is file define how to information will be on display
In .php file, it require begin by 'article' tag and if have only display thumbnail image then need add attribute data-thumbnail-only="1". Because grid plus using stylesheet's attribute 'background-image' to display thumbnail image then it require add data-img="" to div what is the first child of 'article' tag
.php structure in add skin.
.css file in add skin.
Video how to add new skin:
Video guide on how to add new skin to grid layout
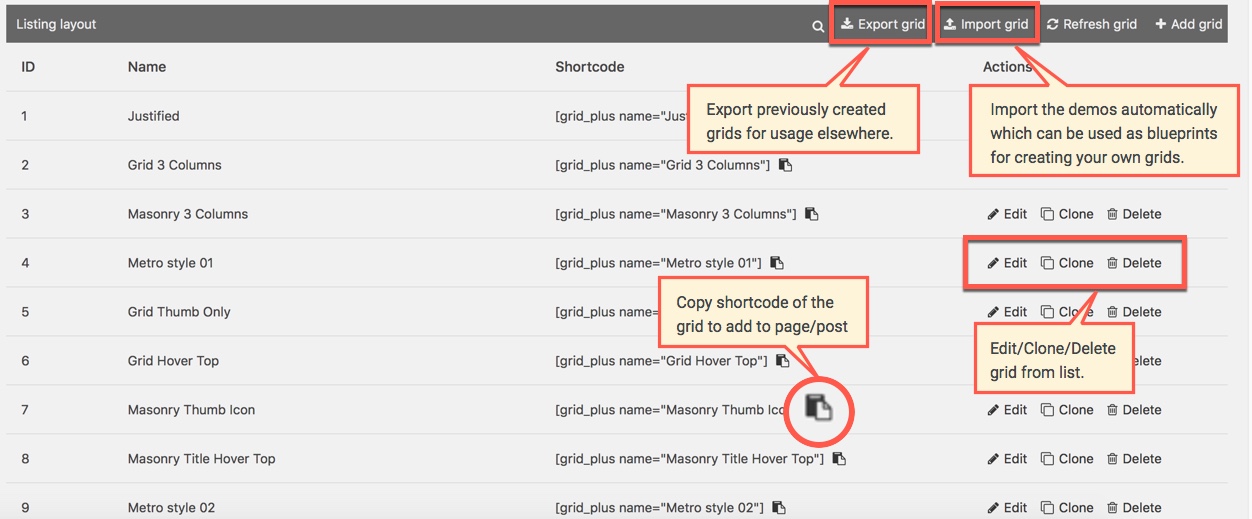
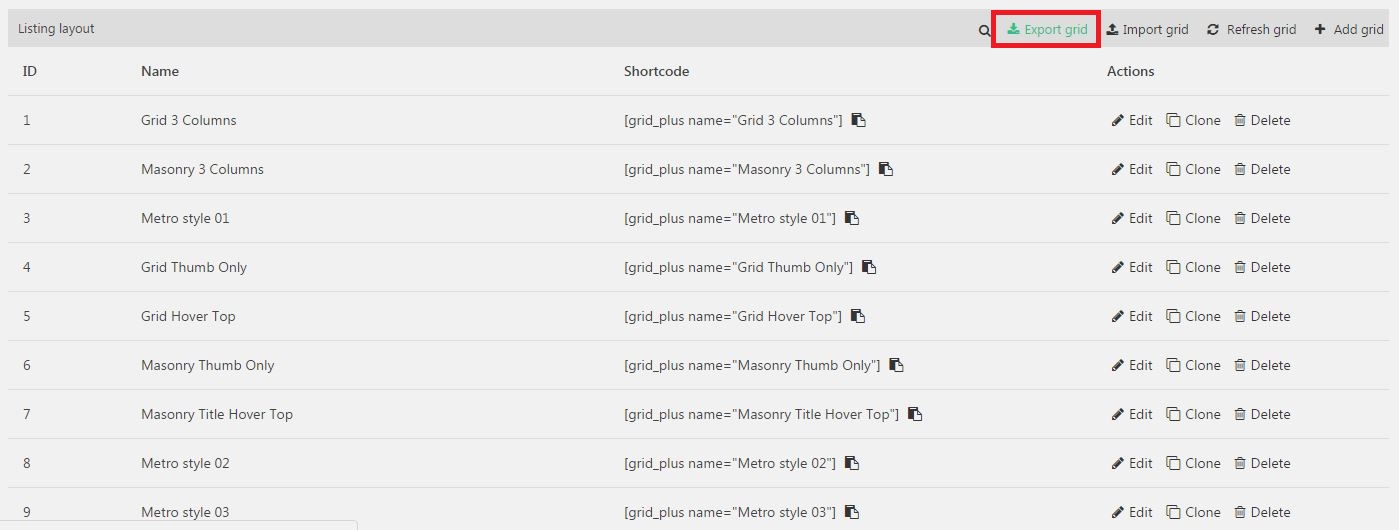
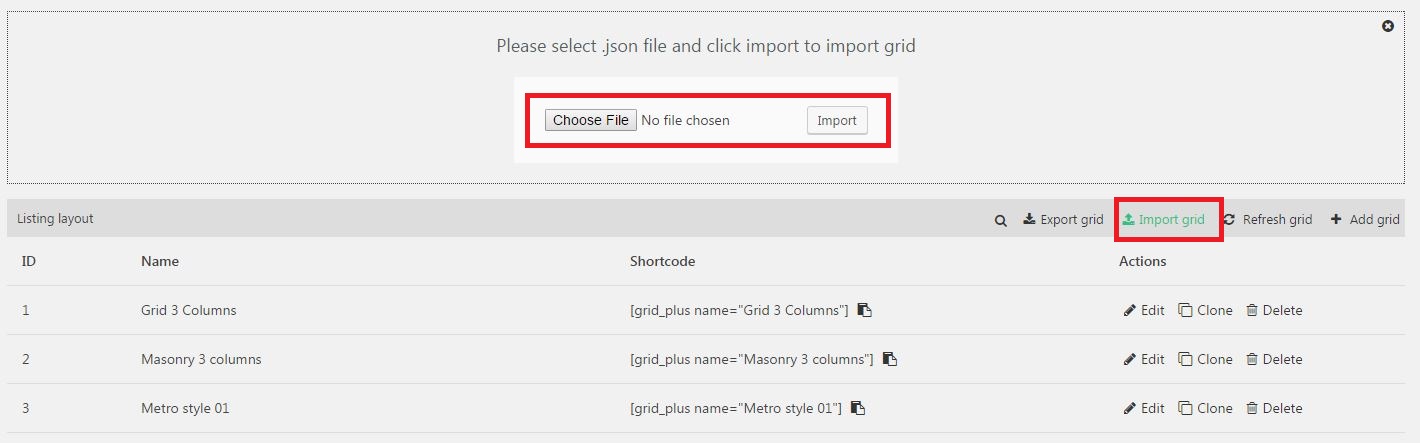
How to export and import layout
With Grid Plus, you can import the demos automatically which can be used as blueprints for creating your own grids and export previously created grids for usage elsewhere such as a second WordPress website. This section will gives you explanation on how to export and import grid layout.
Video guide on how to export and import grid layout
Step 1 : Go to all grid to export/import layout.
Step 2 : Select export grid or import grid option.
Export Grid
Log into your WordPress admin panel.
Navigate to Grid » All grid.
Click to Export in toolbar.
Save file to your location.
Step 2 : Click 'Export' in toolbar.
Import Grid
Log into your WordPress admin panel.
Navigate to Grid » All grid.
Click to Import in toolbar.
Choice file what you have store in export step.
Click 'Import' button to import.
Step 2 : Choice file and click 'Import' button.
Important quote when import:
The import function only import layout what have name difference with layout name have on import site. It not override layout config when duplicate layout name
Thanks you for purchasing our plugin
If you have any questions that are beyond the scope of this documentation or have any troubles, you can contact the G5Theme Support Team by signing up and submit a new topic. G5Them Support Team will be glad to assist you.
Please create topic here: http://support.g5plus.net. Thanks so much for purchasing!